How to Lay a Flagstone Walkway or Patio
 There are many ways to prepare and set a flagstone walkway. The method described here is one of the simpler ways. It costs less and is less labor intensive than setting the stones over a permanent mortar bed. The draw backs are:
1) the joints are filled with decomposed granite (d.g.) rather than grout so the d. g. tends to come out of the joints over time and needs occasional refilling.
2) there may be more settling with the stones over time with this simpler method.
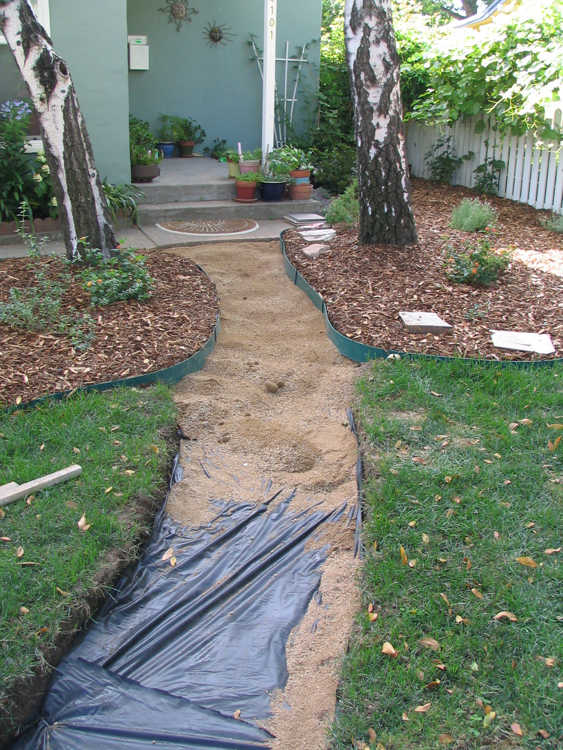
3) weed seeds blown in by the wind might grow in the joints of d.g. but not in the joints in the grouted method. I like the non-mortared simple method because it takes less than a third of the time of the mortared and grouted method.First, decide where you want the boundaries to be. Dig out the area to allow for the two inch thickness of the stone and 3-5 inch depth of the decomposed granite bed. I like to allow for a 5 inch deep bed of d. g. When digging, try to leave the bottom of the dug out area undisturbed as it is already compacted. Next, choose a bender board material and level it. Use stakes to secure the bender board in place. On the walk adjacent to a redwood deck, I inserted screws on the lower part of the interior stakes and screwed the interior stakes to the bender board. Then, I cut the stakes off below the thickness of the stone so that I would not see the top of the stakes in the finished walkway. I laid down landscape fabric to prevent weeds from coming up and held that fabric down with shovels full of d.g.
Click to enlarge any of the images below
Now pour the decomposed granite into the dug out area. Use a hard rake to level the d.g.
Next take a tamping tool and tamp down the d.g. hard
You may take a 2 x 4 and notch it the thickness of the stone to fit over the bender board and screed off the extra decomposed granite. In this particular small walkway my bender board sloped downward from the step to the concrete. I just eyeballed the levelness of the d.g to be 2 inches under the top of the bender board and did not use a screeding board.
Lightly wet the d.g. to help compress it. But don’t use too much water or it becomes rock hard and difficult to work with. Find the best fitting tiles to lay at the perimeters.


Level the stones to each other. You may have to add or remove d.g.


Next, take a rubber mallet or a rubber dead blow hammer to pound the stone into place.


I like to lay out lots of stone around me so I can pick and choose the best fitting and best looking stones. I leave the small openings for filling in last. You can use a chipping hammer to strike the stone and break away edges for a better fit, but I prefer to score the stone with a grinder fitted with a dry cutting diamond blade.

You can then tamp down the stone again with the tamper or just walk on it and rock back and forth on any high stones.

When the walk way or patio is laid, pour d.g. across the entire surface and use a stiff broom to sweep it into place.

Using a spray nozzle attached to a hose and spray the walkway repeatedly for the next 24 hours, adding more d.g. and sweeping it into place when necessary.
Lightly hand wash the tops of the stone with a sponge or rag, wait until the walkway is completely dry for the proceeding 24 hours, and then apply a sealer. I like to use an enhancing solvent-based sealer for deeper penetration and to bring out the natural color of the flagstone. You can apply one or two coats with a small, saturated terry cloth rag.
Photos of finished walk of Sonora Gold Flagstone.
Click any image to enlarge


